


Recently, the milk bath photoshoot has become a beautiful, popular way to celebrate your baby! Whether it’s to celebrate a milestone, to celebrate your breast feeding journey, or simply to have memories of your baby, capturing this special moment is something anyone can do at home! All it takes is a baby, a tub, some flowers/fruit, milk, and a little patience…well maybe a little more than a “little” patience. LOL
The Perfect Milk Bath Location
It’s all about the LIGHT! That’s right, whether you choose to do your milk bath indoors or out you have to find the right light.
For an indoor shoot look for
- natural light – spaces by windows or doors
- clutter free area, or somewhere you can easily make clutter free
- NOT carpet, if your only option is carpet look for a nice plastic drop cloth or table cloth that you don’t mind getting wet
For an outdoor shoot look for
- natural light – watch out for places where the sun is too bright
- clutter free area, or somewhere you can easily make clutter free
- a nice grassy spot free of ants/stickers/other outdoor “issues”
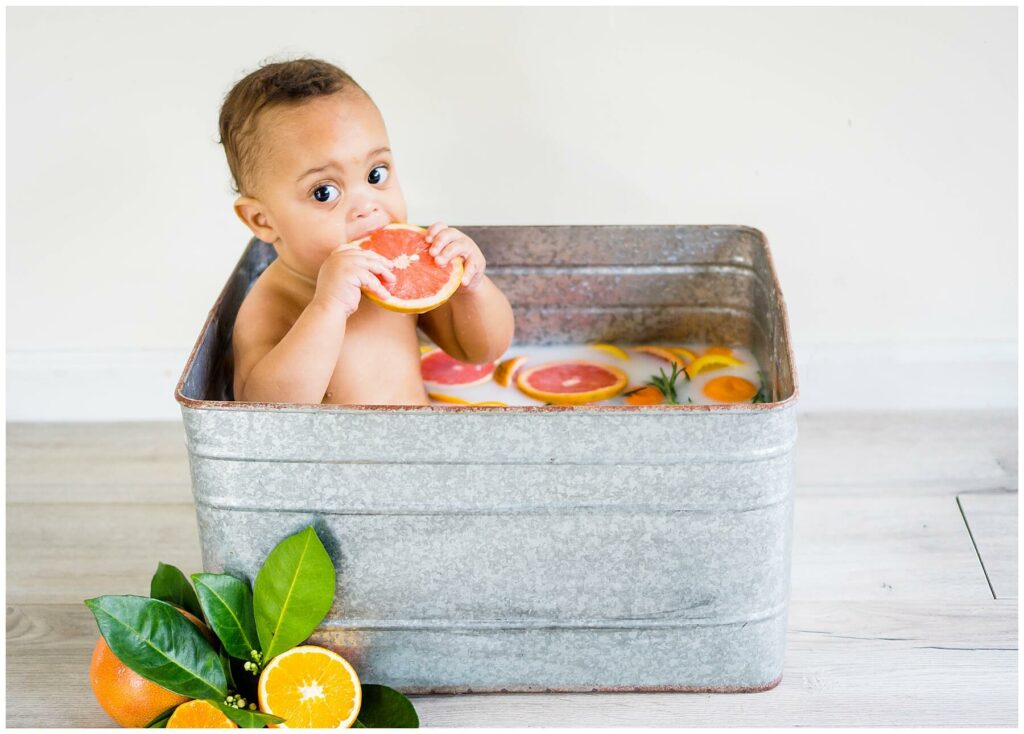
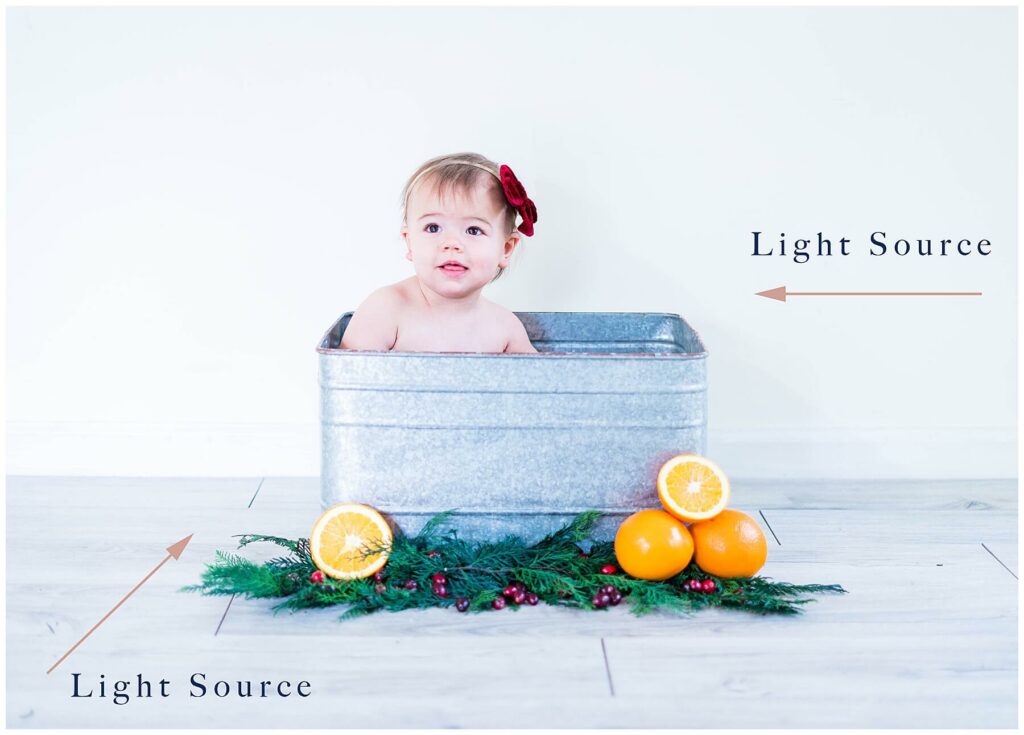
For my indoor shoot the light comes in from the front/right side and the left side of my subject. The two light sources provide ample light but I do have to be careful because the front light can sometimes create harsh shadows. This is why I try to only shoot here after 9:30 am.
Milk Bath Decor
LESS IS MORE!! Can I say that again?? Less is more. I strongly believe using wall decor and going overboard with decorations can take the focus away from the subject and isn’t that why we are here? By keeping the out of tub decorations simple your baby can be the star of the shoot!
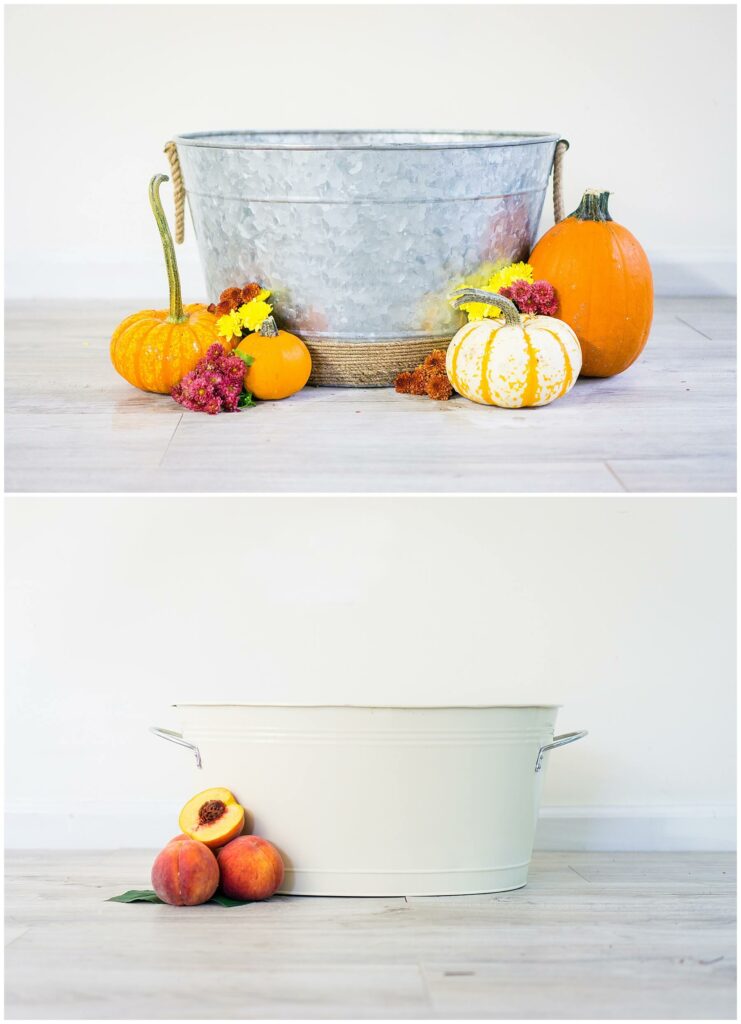
Milk Bath Tub
For the tub, again, simple is best. I prefer a deeper tub over the shallow bowl shoots but that’s a personal preference. If you like a shallow bowl, go for it! I also try to use tubs that don’t have slogans written on them. This again is a personal preference but I don’t care for a tub with “DRANKS!!!!!” written all over the side. Also watch using a tub that is overly shiny, you will be able to see your reflection in the photos.
When filling the tub start by placing a hand towel (preferably one that matches the tub color) on the bottom of the tub. I’ve found that helps make the babies more comfortable.
Also, make sure you don’t put too much water in the tub. I use about 1/2 gallon of milk for each session and the rest of the tub is water. If you fill it up too high there are two issues…first your baby might look like they are drowning. I’ve done this (with a baby that probably needed to wait a little longer to sit properly) and the photos are cute but I look back now and think she looks a little bit like she’s sliding into the deep. The second reason to make sure you don’t fill the water too high. Overflow. It’s not a lot of fun to clean mass amounts of water up because you stick baby in the tub and the water overflows! ????????♀️????????♀️????
Milk Bath Flowers/Fruit
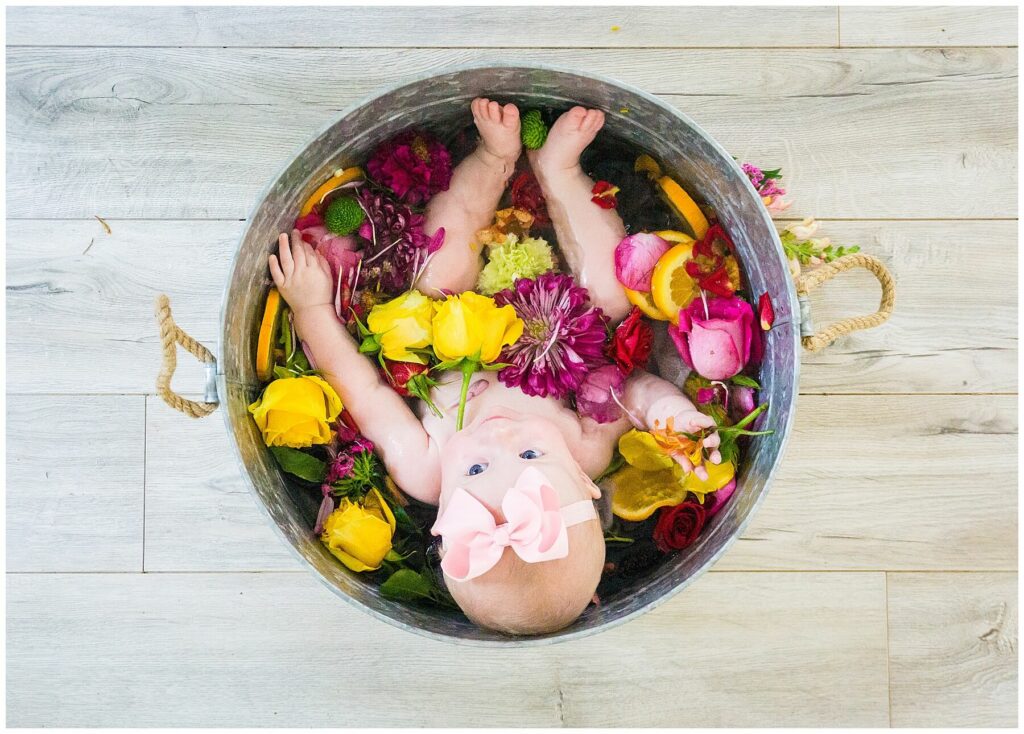
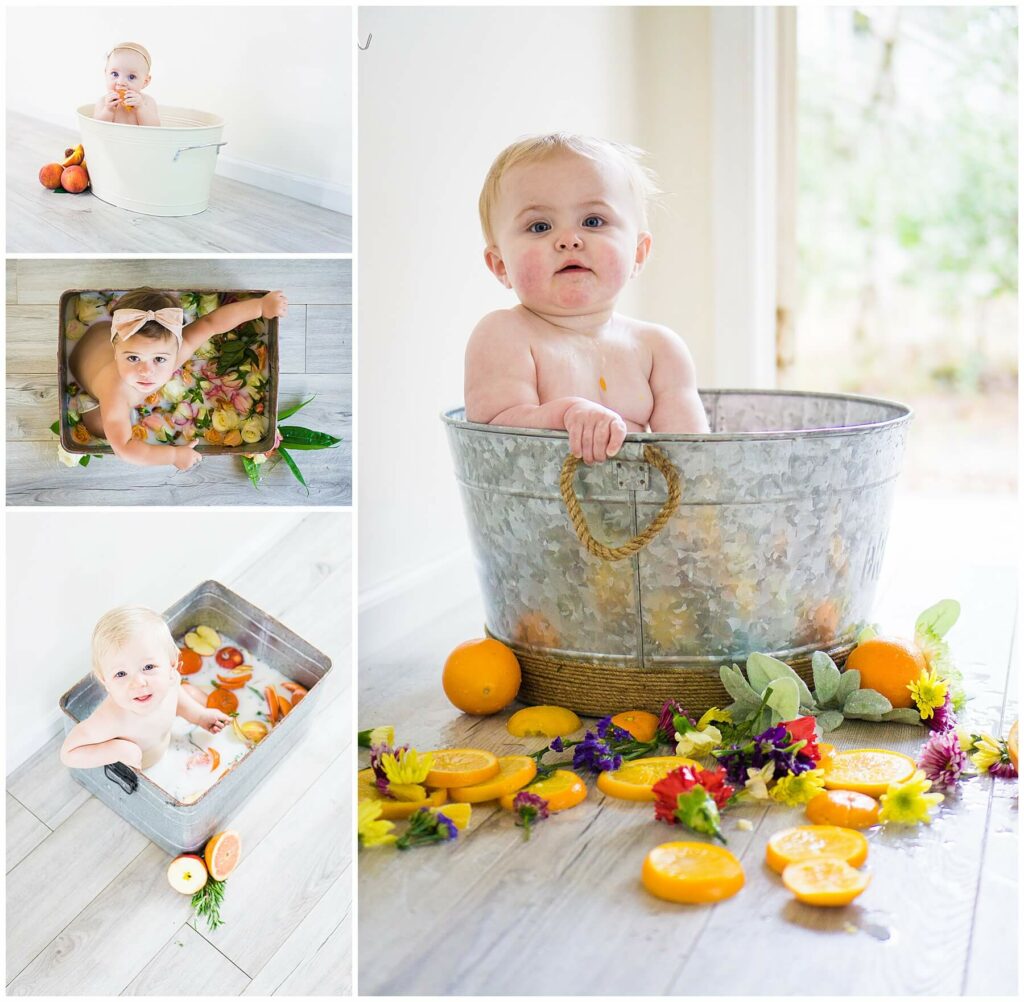
For the fruit and flowers my best advice is to pick what you love and make sure it floats well before buying enough to fill your tub.
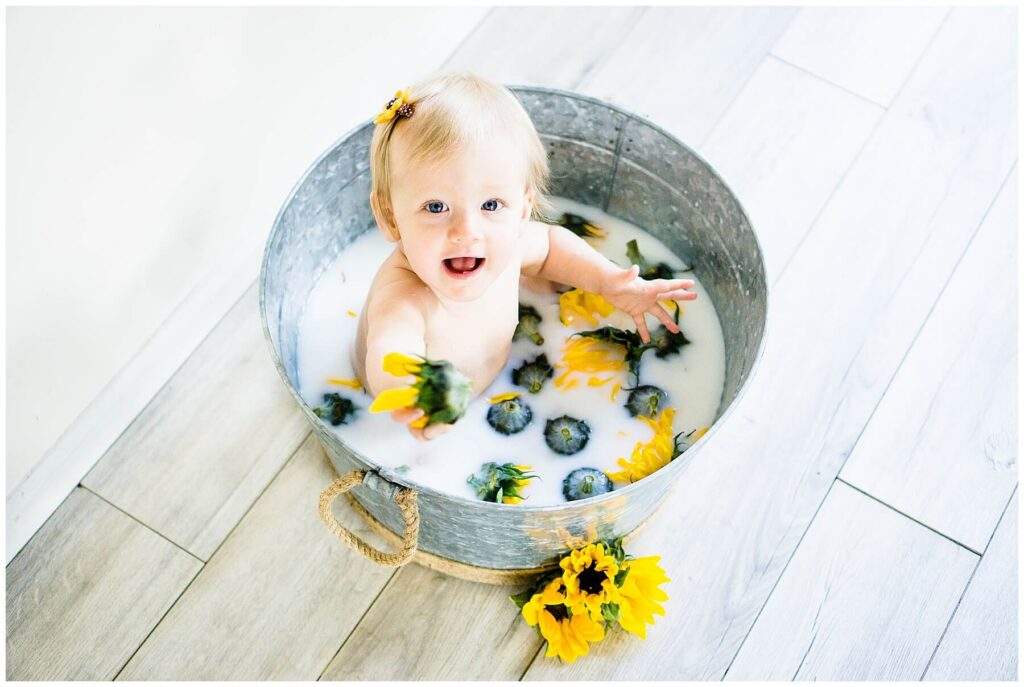
I’ve shot a number of baths and I think citrus and roses float the best and look the best from all angles. Flowers that are too white look ok with the milky water but they aren’t my “go-to”. I did a sunflower bath once that I thought would be amazing, the flowers floated perfectly in my sink when I tested but when we got them all together with a baby they tended to turn themselves upside down and we spent a lot of time trying to flip them back over and quickly get photos.
 For a list of what I have tried and know floats well you can read my Milk Bath FAQ post!
Your Baby
Obviously you will need a baby for this shoot, lol, but here are a few things to consider when planning
- a well rested well fed baby is less likely to stink up your shoot by throwing an “I need a nap” tantrum
- your baby should be able to sit completely unassisted in a bathtub (unassisted not unattended) for at least 15 minutes.
- almost every baby cries, whether it’s at the beginning because they are unsure about this or at the end to let you know you’ve gone on too long. The best advice I have here is to give your baby a chance to calm down. Playing songs he/she likes helps, getting them to play with the fruit and flowers also helps.
- have someone there to help you so you can focus on taking photos and not stress about baby slipping or trying to climb out of the tub.
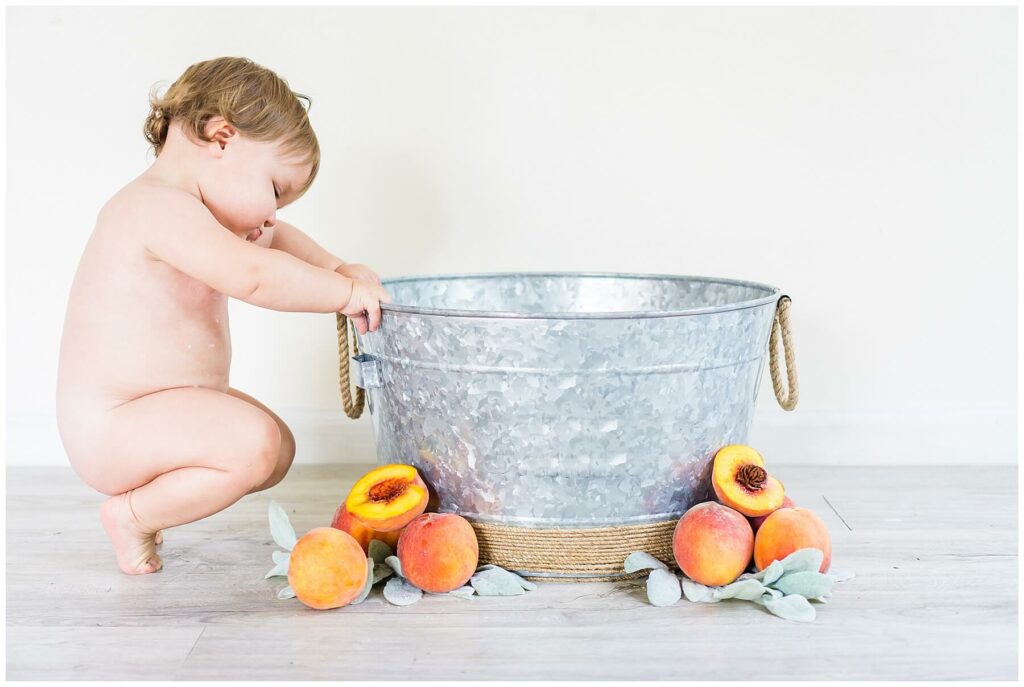
- If your baby won’t get in, that’s ok too! You can still shoot this session. One of my favorite sessions was a little girl won was NOT getting in the tub for her “Sweet as a Peach” first birthday shoot!
Test Your Set Up/Lighting/Camera Settings BEFORE You Bring Baby In
That’s right, set it all up (make sure the water temp is perfect), do some test shots, make adjustments as needed, THEN bring baby in. When you set your little one down in the milk bath it’s go time, not hang on, let me fix this setting time. Doing all the set up and test shots before will ensure you are ready to go when you put your baby in the milk bath and you won’t miss a moment!
Camera Settings
If at all possible use a “real” camera for your shoot. It will help you get better results and will give you some options on how you want the photos styled. Your settings will always be a direct result of the external factors like light (or lack thereof) but here are a few guidelines.
- Shutter Speed – I would suggest no less than 1/320. This will help you catch all the quick movements your baby makes without getting blurry body parts
- Aperture – For aperture, the lower the number (referred to as wider) the more background blur you may be able to achieve BUT if you go too low you may miss focus on your baby, it depends on how much practice you have. If you think you can nail the focus at a wider aperture start around f/2.0 but if you’re a little less confident start around f/3.5 to f/4.0.
- ISO – choose an ISO number to balance your other settings (ie, choose your ISO last) but keep in mind if you go to high your images may become grainy. If you’re having to go over 800-1000 you may need to look for a different location to shoot as you might not have enough natural light.
You can always change the settings during your shoot, especially if you are familiar with changing the settings quickly.
If you want to learn more about camera settings you can check out my Camera Basics blog series.
Have FUN and shoot from different angles!
Always remember to have fun! Get in there and hand them fruit/flowers. Ask them to hand things to you so they know what you are trying to get them to do. If you are having a good time and make this experience a happy one they are more likely to want to join in on the fun!
Looking for more DIY Tips?
Check out a few of my other DIY posts below!


Be the first to comment