Are you ready to use that camera you’ve had sitting around for a few years? Ready to take the camera you’ve been using on auto and step it up a notch? You’re in the right place! Think it’s going to be complicated? Not here, I’m going to break it down in simple terms so you actually understand and can see a difference in your shots immediately.
What is Shutter Speed?
Shutter Speed is the amount of time the camera shutter is open. It is measured in seconds or fractions of seconds and is important to understand so you can capture movement in your photos properly. The smaller the number the faster the shutter is opening and closing. If the number is a fraction, the larger the denominator the faster the speed.
If the shutter speed number is 1 that means for an entire second the shutter will be open and will be capturing everything that is going on in the frame. If the shutter speed is 1/500, then the shutter is opening and closing back in 1/500th of a second.
Capturing Motion
The most noticeable thing shutter speed controls is motion. If you are taking a photo of a child and they are waving their arms, you probably don’t want to look back and see blurry hands. You want those cute fingers to be there waving at you.
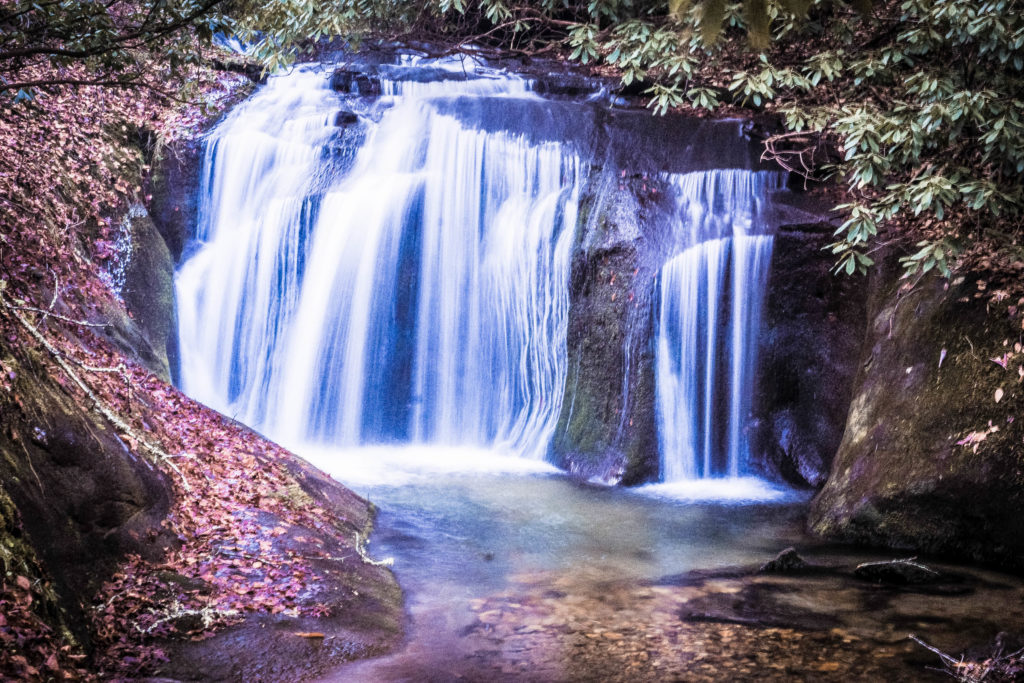
Why would you want “blurry” photos? Well, if you are taking a picture of a waterfall and would like to get that silky effect you want to use a slow shutter speed (and a tripod) to capture the motion of the water. The photo below was taken with a shutter speed of 1 second with a tripod so the only thing moving is the water and not the camera.

As a general rule I try never to go below 1/320 while shooting young children and 1/250 when shooting teenagers and adults. This helps avoid the blurry hands and feet unpredictable kids can slide in the shot!
Go Out and Practice
Now take that camera you’ve been shooting on auto with or haven’t messed with much because you just aren’t sure and set up your own practice.
You can start with semi automatic and switch the dial to S or TV mode. This will allow you to control the shutter speed while still allowing the camera to make the choices on Aperture and ISO.
Go outside, if you can, to practice. If outside isn’t an option find a doorway or a window with lots of light and practice there.
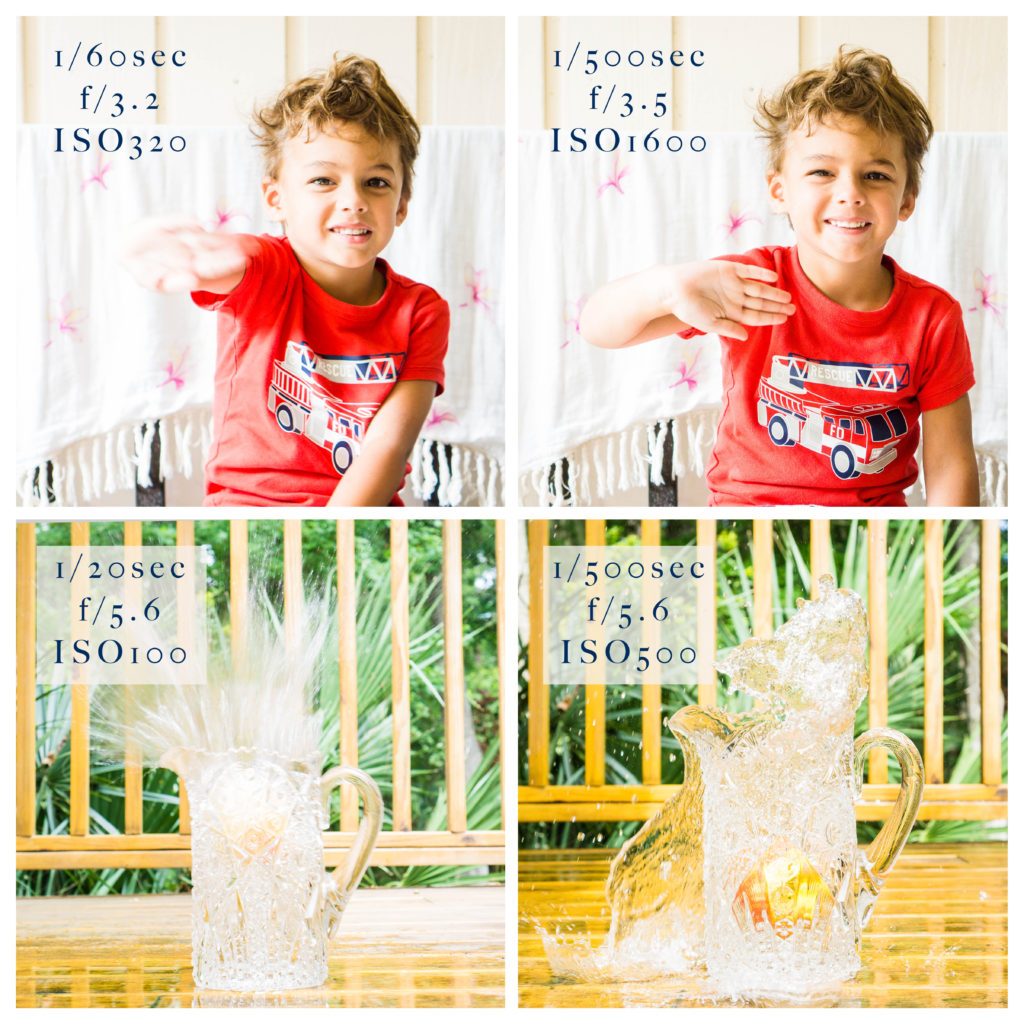
For the first session, grab someone and have them wave while you take a photo at 1/60 and then again at 1/500, see the difference?
For the second, grab a vase or a pitcher, something you can throw into the pitcher, an assistant, and some water. For mine, I used an apple. Fill the pitcher up with water, all the way to the top and after you’ve set up have your assistant drop the object into the water. Do this with a shutter speed of 1/20sec and 1/500sec. You will probably have to do this a few times between missing the timing and your assistant’s ability to ring the pitcher. If your camera has burst mode, this is a good place to use it.

See how in the first set of photos Christopher’s hand is blurry in the first but not in the second? Excuse the pajamas, he woke up right when I was doing these shots so I put hime to work. LOL
In the second set see how the water in the first photo has a more smooth/blurred look but in the second you can see the water more clearly? That’s how shutter speed works!
Ask Away…
If you have any questions, feel free to ask! This blog is the second in a series so stay tuned for the ISO, and Exposure Triangle editions. Check out the Aperture Edition, if you missed it.
If you aren’t already signed up, enter your info below and these blogs and more will come straight to your inbox when they are published.
Hello, What type of camera do you use?
Thank you Patricia (Pat)