Are you ready to use that camera you’ve had sitting around for a few years? Ready to take the camera you’ve been using on auto and step it up a notch? You’re in the right place! Think it’s going to be complicated? Not here, I’m going to break it down in simple terms so you actually understand and can see a difference in your shots immediately.
What is The Exposure Triangle?
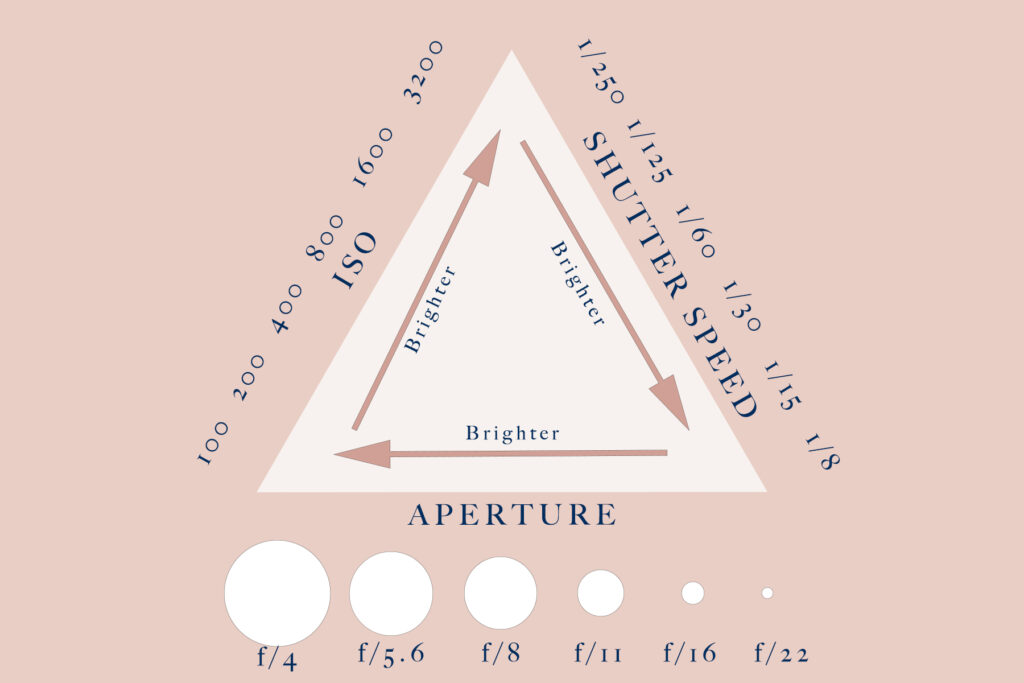
The three aspects of how light enters and interacts with a camera are called the exposure triangle. These three elements are aperture, shutter speed, and ISO.
Managing these elements together is how you can achieve a properly exposed image straight out of your camera. Aperture measures the size of the opening of the lens, shutter speed measures how long the shutter stays open, and ISO can add light where there is no light.

A Metaphor
Think of your camera as a window.
Aperture is the size of the window. The larger the window the more light.
Shutter speed is how fast you open and close the shutters. The longer you leave them open the more light you get in a room.
ISO is how you have your blinds positioned. If you have closed your blinds you are letting the smallest amount of light enter the room. Opening the position of the blinds will allow for more light but you may see the shadows on your subject (aka grain or noise).
Think about how many ways you can increase the light inside. You could build a larger window (increase aperture), you could leave the shutters open longer (increase shutter speed), or you could open the blinds (increase ISO).
This for That
Easy enough, right? The biggest thing to remember is that changing each element impacts exposure since the three elements work together to achieve the correct exposure and also other aspects of your photo.
- changing aperture changes your depth of field
- changing shutter speed changes how motion is captured
- changing ISO can cause more or less grain
You can read more about each of these topics by clicking APERTURE, SHUTTER SPEED, or ISO.
What is correct exposure?
Another great saying my mentor, Amanda Hedgepeth, says is “there is no CEO of photography”. I truly feel this statement applies when discussing correct exposure.
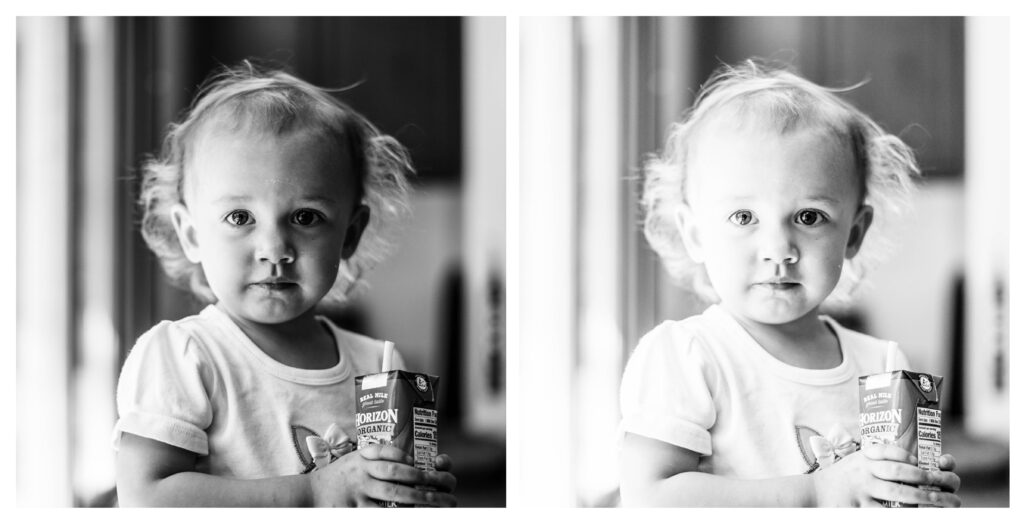
Before you roll your eyes and start googling let me explain. An easy way to look at underexposed is a photograph that is too dark and overexposed, well it’s the opposite, a photograph that has too much light.
But which is “correct”. Well, my opinion is that’s up to you. I think it depends on what you are trying to convey with a photograph and what your personal style is. I personally think the entire last episode of Game of Thrones was underexposed but creatively that was clearly what they were going for and I’m sure there were people out there who thought it was perfect.
I personally prefer light bright photographs but I’m sure there are people who don’t care for so much white in a picture. It’s a personal preference.
Look at these two images and decide which is “wrong”. (Pssst…the answer is neither, although I personally prefer the lighter one LOL)

Go Out and Practice
Now since you’ve read the other blogs in this series and you’ve been practicing, take you camera, slide into manual, and go out and practice moving each setting so you can see the changes they make. If you aren’t sure where to start when setting the three elements together go back into auto and see what your camera says. Take these settings AS A STARTING POINT!! and set your manual settings. From there, move each setting until you have reached the “correct” exposure.
The digital age means you can take as many shots as it takes and it doesn’t cost extra!
Ask Away…
If you have any questions, feel free to ask! I love helping and seeing people getting out and using their cameras!
Be the first to comment